
For most freelancers, agencies, and small businesses, the right answer is a white-label SaaS platform with a custom domain — not a custom build, not a bare-bones embedded SDK. You get your logo, your colors, your domain, and a professional client experience in days rather than months, at a fraction of the cost of building from scratch. Your immediate next step: secure your subdomain (something like clients.yourbusiness.com) and start a trial with a platform that supports custom domain branding and branded email sending out of the box.
Here is what that decision means in practice, and exactly how to execute it:
- Recommended approach: White-label SaaS with custom domain and branded emails
- Why it wins for most teams: Fastest to launch, lowest maintenance burden, and consistent brand experience without engineering overhead
- Immediate next step: Register your client subdomain and verify it with your chosen platform before configuring anything else
Key Takeaways
White-label SaaS with a custom domain is the fastest, most cost-effective path to a fully branded client portal for most freelancers, agencies, and small businesses.
| Point | Details |
|---|---|
| Start with your domain | Secure and verify your client subdomain before configuring any other branding element. |
| Brand beyond the logo | Custom domain, branded emails (SPF/DKIM), PDF templates, and microcopy all shape client trust. |
| Use a staged rollout | Configure in staging, run a 4-week phased launch, and pilot with 3–5 clients before full rollout. |
| Lock down permissions early | Define admin, team, and client roles before onboarding anyone to avoid data exposure and rework. |
| Realclient for fast launch | Realclient delivers custom domains, branded emails, e-signatures, and payments in one platform with no build time. |
Table of Contents
- What does "white-label" client portal branding actually mean?
- White-label SaaS vs. embedded SDK vs. custom build: which fits your situation?
- What exactly should you brand? A practical checklist
- Technical and integration checklist before you configure anything
- Security, governance, and permission controls you must plan for
- How to plan a phased 4-week portal launch
- How to choose the right approach and vendor
- Pre-launch implementation checklist and testing plan
- What most teams get wrong when branding a client portal
- Realclient gives you a fully branded portal without the build time
- Sources
What does "white-label" client portal branding actually mean?
Most people hear "white-label client portal" and picture swapping a logo. The reality goes several layers deeper, and understanding those layers is what separates a portal that feels like your product from one that quietly reminds clients they are inside someone else's software.
A white-label portal means the vendor's name, logo, and URLs are removed entirely. Your clients see only your brand. A branded SaaS tenant, by contrast, lets you add your logo and colors but may still expose the vendor's domain or support links. A plain SaaS tenant gives you almost no visual control. The difference matters because visitors form first impressions of online interfaces in roughly 0.05 seconds — and a login page that shows a competitor's name erodes the trust you worked to build.
The full stack of branding elements you should expect to control includes:
- Custom domain or subdomain (
clients.youragency.cominstead ofvendor.app/youragency) - Login and registration screen — logo, background, welcome copy
- Favicon — the small icon in browser tabs
- Color palette and typography applied across the entire UI
- Email templates — from address, subject lines, header/footer, and body copy
- PDF and invoice templates — letterhead, logo placement, footer
- Report and dashboard headers
- Shared-file metadata — file names, watermarks, and download page branding
- Portal microcopy — button labels, empty states, error messages
A well-branded portal does not just look like you — it sounds like you. Every email notification, every PDF footer, and every empty-state message should use the same voice your clients hear in your proposals and contracts. That consistency is what makes the portal feel like a product you built, not a tool you rented.
When is simple logo-plus-color enough? If your clients are internal stakeholders or long-term retainer accounts who already know your brand, a lighter touch works. But if the portal is a client's first or most frequent touchpoint with your business, deeper branding — custom domain, branded emails, and consistent microcopy — pays back in trust and perceived professionalism. Brand portals that centralize approved digital assets keep every client-facing surface consistent across teams and channels, which matters especially as you scale.
White-label SaaS vs. embedded SDK vs. custom build: which fits your situation?
Choosing the right approach comes down to four variables: how fast you need to launch, how much control you need over the experience, what your budget looks like, and whether you have in-house developers. Here is how the three main paths compare.
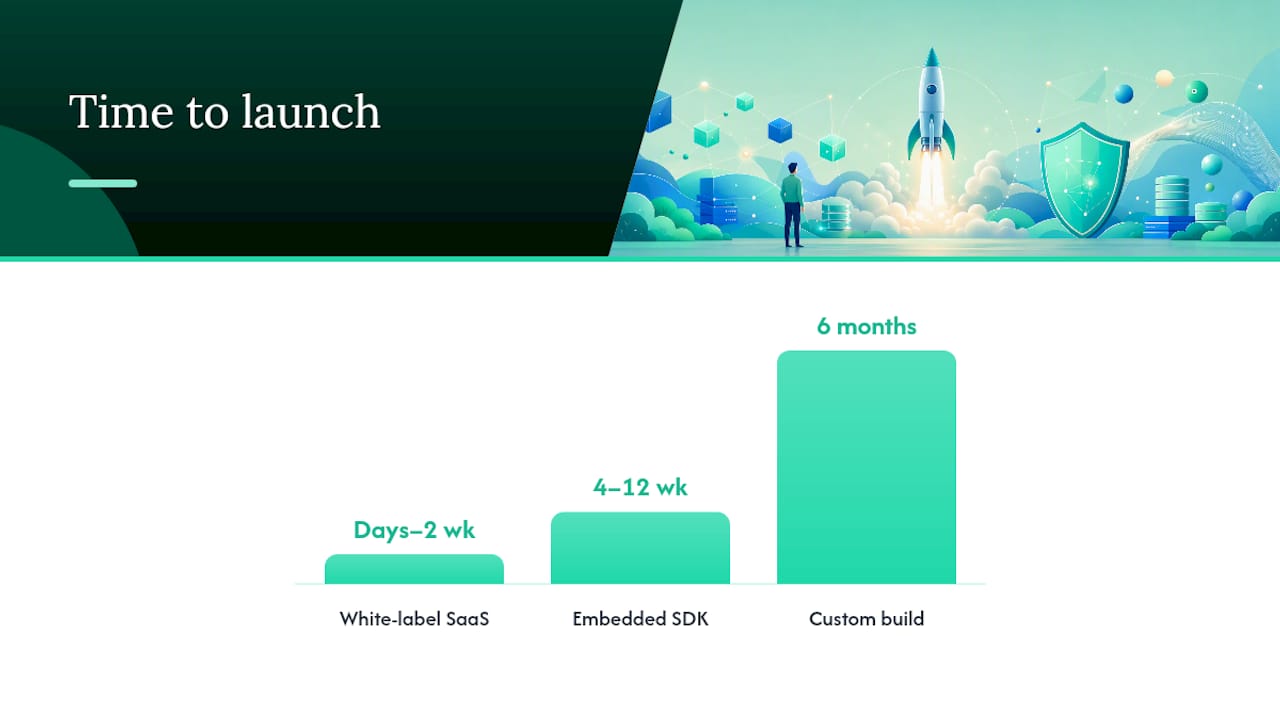
| Dimension | White-label SaaS | Embedded SDK | Custom build |
|---|---|---|---|
| Branding depth | High (domain, emails, UI theme, PDFs) | Medium (UI only, host app controls shell) | Full (every pixel) |
| Time to launch | Days to 2 weeks | 4–12 weeks | 6 months |
| Upfront cost | Low to medium (subscription) | Medium (dev time + licensing) | High (engineering team) |
| Maintenance burden | Vendor handles updates | Shared (vendor SDK + your integration) | Entirely yours |
| Security control | Vendor-managed with config options | Shared responsibility | Full ownership |
| Best for | Freelancers, agencies, SMBs | SaaS products adding portal features | Enterprise platforms with unique requirements |
White-label SaaS is the right call for the vast majority of professional services teams. You configure branding in an admin panel, point your DNS, and launch. Best-practice UX patterns for SaaS portals include tenant-level theming and staged deployment models that reduce risk — both of which good white-label platforms handle for you automatically.
Embedded SDK makes sense when you are building a product and need portal functionality to live inside your own application shell. The branding is controlled by your app, but the underlying portal logic is provided by the SDK vendor. Expect 4–12 weeks of engineering work before clients see anything.
Custom build is rarely justified unless your portal requirements are genuinely unique, you have a dedicated engineering team, and you are prepared to own security, compliance, and maintenance indefinitely. No-code and low-code builders can accelerate this path, but deep branding, SSO, and enterprise integrations typically still require extra configuration or engineering even on those platforms.
Save the custom build conversation for when you have a product team.*
What exactly should you brand? A practical checklist
Good client portal design is not just about aesthetics. It is about removing every moment of friction or confusion that reminds your client they are inside a third-party tool. Work through this checklist before you configure anything.
Visual and identity elements
- Custom domain or subdomain (DNS verified, SSL active)
- Logo uploaded in correct formats (SVG preferred, PNG fallback)
- Favicon (32×32 and 16×16 px minimum)
- Primary and secondary brand colors applied to buttons, links, and headers
- Typography matched to your external brand (or a close system-font substitute)
- Login page background, welcome headline, and subtext
- Portal header and footer with your name and support contact
Communication and document templates
- Email sender name and from-address (
hello@yourdomain.com, notnoreply@vendor.com) - Email header and footer with your logo and brand colors
- Notification email copy reviewed for tone consistency
- PDF/invoice template with your letterhead, logo, and footer
- Report headers and cover pages
UX and microcopy
- Welcome message on first login (personalized where possible)
- Default dashboard modules arranged to match your workflow
- User-facing labels in plain language (avoid vendor jargon like "workspace" if your clients expect "project")
- Empty-state messages that match your brand voice
- Error messages that are helpful, not generic
Accessibility and mobile requirements
Every branded portal must meet WCAG 2.1 AA standards as a baseline. That means sufficient color contrast (4.5:1 for body text), keyboard navigability, and screen-reader-compatible labels on all interactive elements. Mobile responsiveness is non-negotiable: test every branded screen on iOS Safari and Android Chrome before launch, not after.
Pro Tip: For your initial launch, prioritize the five highest-visibility elements: custom domain, login page, email sender, primary color, and logo. Everything else — PDF templates, report headers, microcopy — can be polished in the two weeks after go-live without affecting client trust.
Technical and integration checklist before you configure anything
Getting the branding right visually is only half the job. The technical layer underneath determines whether your portal actually works as a branded product or falls apart the first time a client tries to pay an invoice or sign a contract.
Priority integrations to plan for
- Custom domain and SSL — Point your subdomain's CNAME record to the platform, then verify SSL provisioning. Most platforms auto-provision via Let's Encrypt, but confirm this before launch.
- Email sending domain (SPF/DKIM/DMARC) — Without proper DNS records, your branded notification emails land in spam. This is the single most commonly skipped step.
- SSO/OAuth — If your clients already have accounts with Google, Microsoft, or your own identity provider, configure SSO before onboarding anyone. Retrofitting SSO after launch is painful.
- Payment gateways — Connect Stripe or PayPal in your platform's payment settings, then run a test transaction end-to-end before any client sees the portal.
- E-signature — Verify that signed documents carry your brand name in the audit trail, not the vendor's.
- CRM/PSA sync via API or webhook — Map your data fields before migration, not during.
- Analytics — Add your own tracking (Google Analytics 4 or equivalent) to the portal if the platform allows custom script injection.
DNS and SSL specifics
- Add a CNAME record:
clients.yourdomain.com → yourplatform.app - Allow 24–48 hours for DNS propagation before testing
- Confirm the SSL certificate covers your subdomain specifically
- Set up a separate email-sending subdomain (
mail.yourdomain.com) for transactional emails
Performance and asset delivery
Branded assets — logos, background images, custom fonts — should be served from a CDN, not uploaded as unoptimized files. Compress images to under 100KB, use SVG for logos wherever possible, and test page load time on a 4G mobile connection. A slow login page is a brand problem, not just a technical one.
Staging vs. production
- Configure and test everything in a staging environment first
- Migrate existing client data only after branding and integrations pass QA
- Test API rate limits and webhook delivery under realistic load before go-live
Security, governance, and permission controls you must plan for
A branded portal that leaks client data or lets the wrong person change your logo is worse than no portal at all. Security and governance planning should happen in parallel with branding configuration, not after.
Admin roles and granular permissions
- Define who can modify portal branding (typically: owner or admin only)
- Set role-based access for projects, files, and financial data (client, team member, admin)
- Restrict client visibility to their own projects and files only
- Control who can invite new clients and who can revoke access
Authentication controls
- Enable multi-factor authentication (MFA) for all admin and team accounts
- Configure SSO for clients where your organization uses a managed identity provider
- Set session timeout policies (30–60 minutes of inactivity is a reasonable default)
- Consider IP allowlisting for admin accounts if your team works from fixed locations
Data handling and compliance
- Confirm encryption in transit (TLS 1.2 or higher) and at rest (AES-256 or equivalent)
- Review the platform's audit log capabilities — you need a record of who accessed what and when
- Understand the platform's data export and backup policies before you sign a contract
- For clients in the EU, your portal must comply with GDPR regardless of where your business is based. If you handle protected health information, HIPAA requirements apply. Consult legal counsel before launching a portal in either context.
A Gartner survey predicts that self-service and live chat will surpass traditional channels as top customer-service technologies by 2027. A branded self-service portal is not a nice-to-have — it is where client experience investment is heading.
How to plan a phased 4-week portal launch
A rushed portal launch creates rework. A phased rollout with clear sign-off gates protects your brand and your client relationships.
Week-by-week plan
| Week | Phase | Key tasks | Sign-off gate |
|---|---|---|---|
| Week 1 | Discovery & assets | Collect brand assets, register subdomain, identify integrations, assign admin roles | Brand assets approved by stakeholder |
| Week 2 | Configure & integrate | Set up branding in staging, configure SSO and custom domain, connect payments and e-sign | Staging environment passes visual QA |
| Week 3 | Test & validate | End-to-end QA (login, file upload, payment, signature, permissions), accessibility audit, mobile test | All critical test cases pass; security review complete |
| Week 4 | Soft launch & rollout | Invite 3–5 pilot clients, collect feedback, fix issues, roll out to full client list | Pilot clients confirm portal works as expected |
Numbered rollout steps
- Collect all brand assets (logo files, color hex codes, font names, email copy) and store them in a shared folder accessible to your implementation team.
- Register and verify your client subdomain with your DNS provider.
- Configure branding in the platform's staging environment — never in production first.
- Set up and test all integrations (payments, e-sign, SSO) in staging with real test credentials.
- Run a full accessibility and mobile-responsiveness audit against WCAG 2.1 AA.
- Complete a security review: confirm MFA is active, permissions are scoped correctly, and audit logs are enabled.
- Invite pilot clients and gather structured feedback over 5–7 days.
- Address feedback, then roll out to your full client list with a brief onboarding email explaining what is new.
How to choose the right approach and vendor
Before you commit to a platform, run through this decision checklist and use the vendor questions below in every demo.
Decision checklist
- Timeline: Can you wait 6+ months for a custom build, or do you need to launch in weeks?
- Budget: Is a monthly subscription viable, or do you have capital for a one-time engineering project?
- Data volume: How many active clients and files will the portal hold at launch and in 12 months?
- Customization depth: Do you need full CSS control, or will logo/color/domain cover your needs?
- In-house dev capacity: Do you have a developer who can maintain a custom integration?
- Support SLAs: What response time do you need when something breaks for a client?
Vendor questions to ask in every demo
- Does the platform support a fully custom domain with SSL, including branded email sending?
- Can I remove all vendor branding from the client-facing interface, including support links and footer text?
- Does the platform support SSO via OAuth 2.0 or SAML?
- What APIs and webhooks are available, and are they included in the base plan?
- Can I export all client data in a portable format if I leave?
- What is the uptime SLA, and where can I see the status page?
- Are security certifications (SOC 2, ISO 27001) available for review?
- Is white-label domain support included in the plan I am evaluating, or is it an add-on?
Red flags to watch for
- The vendor's logo or name appears anywhere in the client-facing interface with no option to remove it
- Data export is restricted or requires a support ticket
- Granular permissions are not available on your plan tier
- There is no staging or sandbox environment
- White-label domain support is priced as a premium add-on with unclear costs
Pre-launch implementation checklist and testing plan
Copy this checklist into your project management tool before you flip the portal live.
Branding and DNS
- Logo uploaded in correct formats and dimensions
- Favicon uploaded and displaying in browser tab
- Brand colors applied to all UI elements
- Custom domain CNAME record verified
- SSL certificate active and covering the subdomain
- Email sending domain configured with SPF, DKIM, and DMARC records
Authentication and integrations
- SSO configured and tested with at least one real user account
- MFA enabled for all admin and team accounts
- Payment gateway connected and test transaction completed
- E-signature flow tested end-to-end with a sample document
- Webhook delivery confirmed for at least one trigger event
Content and microcopy
- Welcome message reviewed and approved
- All email templates reviewed for tone and brand voice consistency
- PDF/invoice template tested with a real invoice
- User-facing labels reviewed for plain language
QA and accessibility
- Login flow tested on Chrome, Safari, Firefox, and mobile browsers
- File upload and download tested with files of varying sizes
- Payment flow tested from client perspective
- Role-permission checks: confirm clients cannot access other clients' data
- WCAG 2.1 AA color contrast verified for all branded colors
- Keyboard navigation tested on login and dashboard screens
Final sign-off
- Stakeholder approval on visual branding in staging
- Pilot client acceptance (at least 3 clients confirm portal works as expected)
- Rollback plan documented (how to revert DNS and notify clients if a critical issue arises post-launch)
What most teams get wrong when branding a client portal
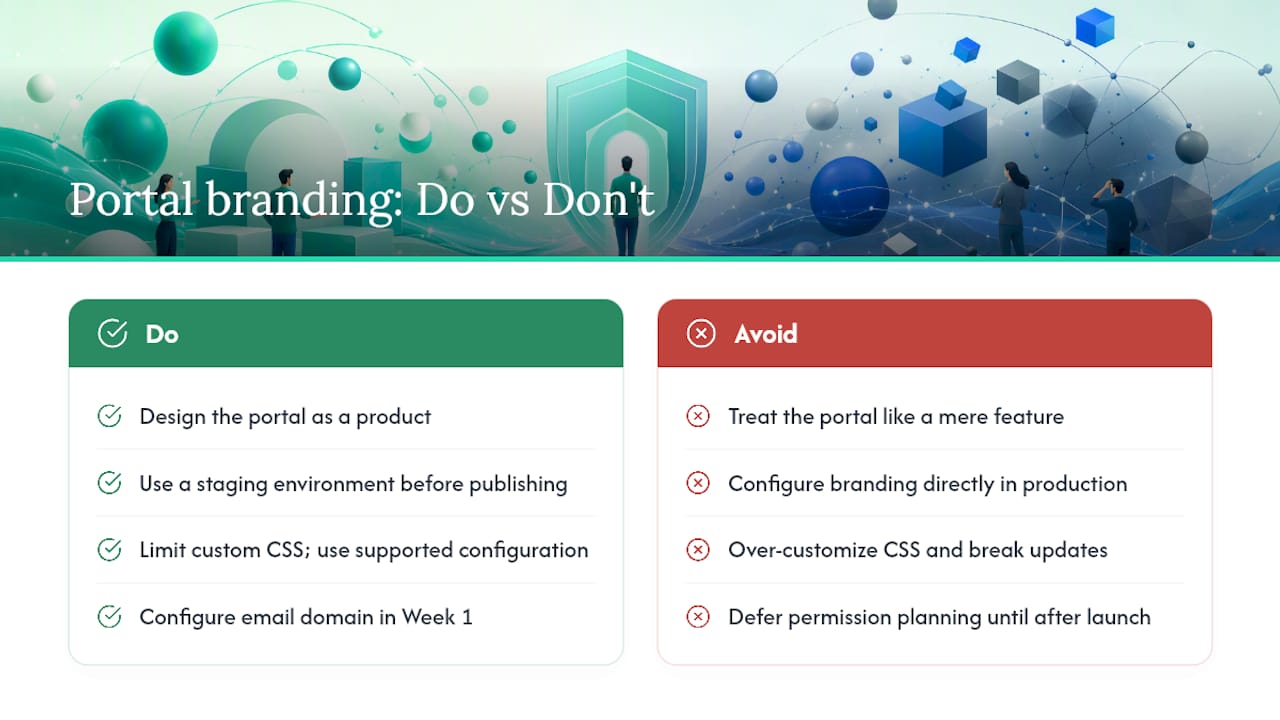
The most common mistake is treating the portal as a feature rather than a product. Teams spend hours on the logo and colors, then ship a portal with generic email notifications, vendor-branded PDF footers, and a login page that says "Powered by [Vendor]." Clients notice. The portal feels like a tool you handed them, not a service you built for them.
Skipping the staging environment is the second most expensive mistake. Configuring branding directly in production means your clients may see a half-finished login page or a broken email template during the transition. A staging environment costs nothing extra on most platforms and saves hours of emergency fixes.
Over-customizing CSS is a trap that catches agencies especially. Spending two weeks on pixel-perfect custom styles that break every time the vendor ships an update is not a branding win — it is a maintenance burden. Focus on the configuration options the platform officially supports, and save custom CSS for genuinely necessary adjustments.
Email deliverability is consistently overlooked. A branded portal that sends notifications from a generic vendor domain, or worse, fails SPF/DKIM checks and lands in spam, undermines the entire client experience. Set up your email sending domain in Week 1, not as an afterthought.
Finally, permission planning is almost always deferred until after launch, when it causes the most disruption. Decide who can change branding, who can invite clients, and what each role can see before you onboard anyone. Retrofitting permissions after clients are active is awkward and sometimes exposes data you did not intend to share.
The corrective action in every case is the same: design the portal as a client-facing product from day one. That means a dedicated onboarding flow, copy that matches your external brand voice, and a permission model that reflects how your team actually works.
Realclient gives you a fully branded portal without the build time
Well-designed client portals can reduce inbound calls and emails by 60–80% when treated as a product rather than an afterthought. Realclient is built on exactly that premise — a platform where freelancers, agencies, and small businesses ship a fully branded client experience without writing a line of code.
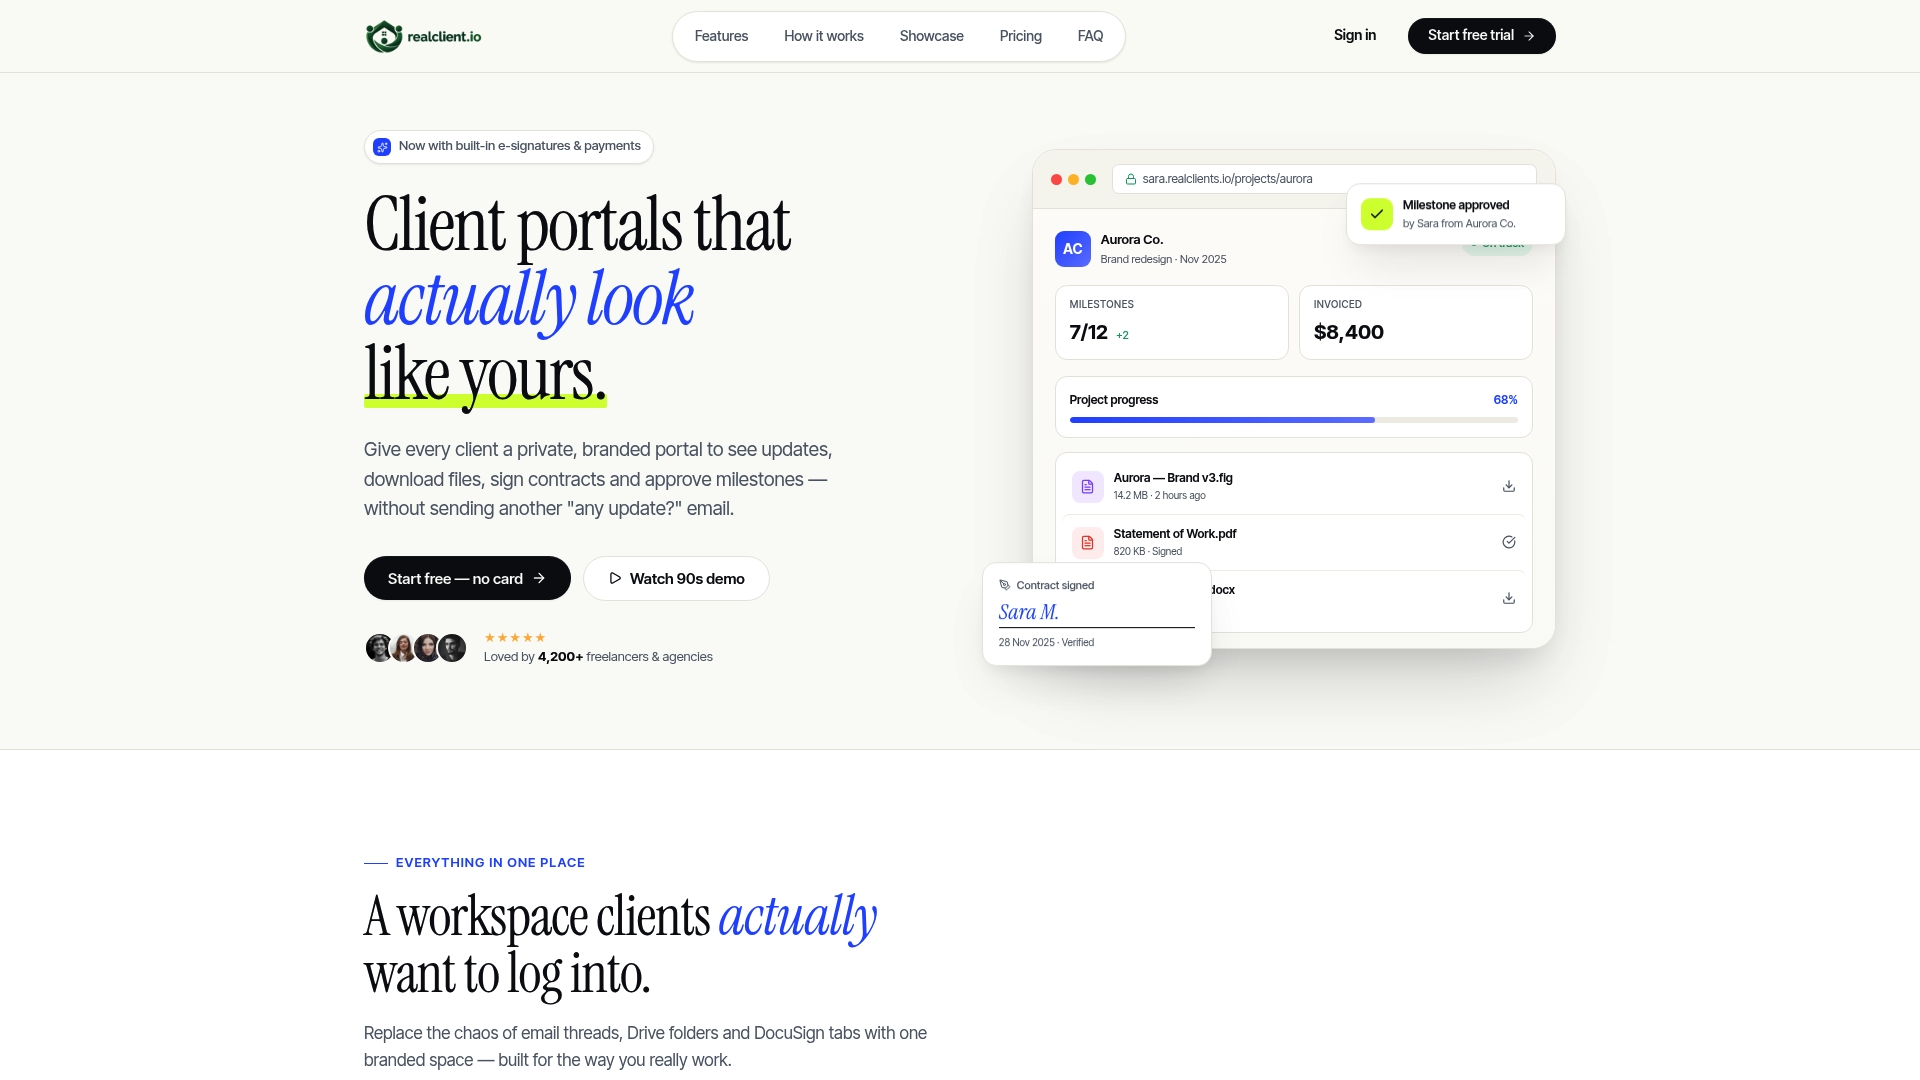
Your portal runs on your custom domain, sends emails from your address, and carries your logo, colors, and voice across every client touchpoint — invoices, contracts, file-sharing pages, and project updates. Payments connect directly through Stripe and PayPal. E-signatures are built in. Granular permissions let you control exactly what each client and team member can see. With over $48 million invoiced through Realclient portals, the platform is proven at the scale freelancers and agencies actually work at.
See Realclient's pricing and start a free trial today, or browse real branded portal examples to see what your client experience could look like.
Sources
- Gartner survey finds self-service and live chat will surpass traditional channels as top customer-service technologies by 2027
- The Role of Client Portal Website Design in 2026 – PRYDE Designs
- Brand Portal what is? How it works, advantages and use cases | THRON
Select vendor documentation only after you have shortlisted two or three platforms — vendor docs are most useful for confirming specific configuration details, not for making the initial build-vs-buy decision.