
Use Checkout Sessions with the Payment Element for most integrations. It handles tax, discounts, and adaptive pricing without much custom code. Need something even faster? Payment Links work for no-code needs, and Elements with Payment Intents fits fully custom checkout flows. Either way, your first move is the same: create a Stripe account and pull your test API keys.
TL;DR:
- Most teams should default to using Checkout Sessions with Payment Element to leverage Stripe's automatic tax, localization, and adaptive pricing features, reducing development effort.
- Payment Links offer the quickest launch but lack customization; they suit freelancers or one-off transactions, while Elements with Payment Intents require significant development for full control.
- Setting up Stripe takes around fifteen minutes: activate test mode, install CLI, forward webhooks locally, and securely store API keys in environment variables.
- Building a reliable payment workflow requires creating checkout sessions on the server, handling webhook verification, and checking session status before confirming transactions.
- Proper testing involves simulating various payment scenarios through the Stripe CLI, verifying webhook signatures, updating API keys before going live, and monitoring payment logs during initial deployment.
Table of Contents
- Which Stripe Integration Path Fits Your Project?
- How Do You Set Up Your Stripe Development Environment?
- How Do You Implement Checkout Sessions Step by Step?
- When Should You Build With Payment Intents and Elements Instead?
- What Does a Stripe Testing and Go-Live Checklist Look Like?
- How Does Stripe Billing Handle Subscriptions and Invoices?
- What Security and Compliance Rules Actually Matter Here?
- How Realclient Embeds Stripe Checkout Inside Client Portals
- Where to Read the Official Stripe Documentation Next
- Why Most Stripe Advice Skips the Part That Actually Slows Teams Down
- Sources
Which Stripe Integration Path Fits Your Project?
Picking the right path comes down to a trade-off between development time, control, and built-in features. Payment Links need zero code. You generate a URL, drop it in an email or invoice, and Stripe hosts the entire transaction. That speed comes at the cost of customization. You can't control the checkout experience beyond a logo and color.
Checkout Sessions with the Payment Element sit in the middle. You write a small server endpoint, but Stripe's hosted page handles tax calculation, currency localization, and adaptive pricing automatically. This is where Stripe recommends most teams land, since it cuts the code surface area dramatically compared to building your own form.
Elements with Payment Intents gives you full control over every pixel of the payment form, embedded directly in your app. That control means you own more of the compliance and error handling yourself.
Stripe Billing sits on top of any of these paths once you need recurring charges, tiered pricing, or usage-based invoicing rather than one-time payments.
- Payment Links: fastest to launch, least customizable, good for freelancers sending one-off invoices
- Checkout Sessions (Payment Element): low code, built-in tax and localization, best default for most SaaS and service businesses
- Elements/Payment Intents: full UI control, highest engineering cost, needed for custom checkout flows or unusual payment methods
- Stripe Billing: layered on top for subscriptions, metered usage, and automated invoicing
Pro Tip: Default to Checkout Sessions with the Payment Element unless you have a specific reason not to. You'll ship faster and inherit Stripe's tax and pricing logic instead of maintaining your own.
How Do You Set Up Your Stripe Development Environment?
Getting your Stripe payment setup ready takes about fifteen minutes if you follow the order below.
- Create and activate your Stripe account, then flip into test mode using the toggle in the dashboard. Test mode gives you a full sandbox with fake cards and no real money movement.
- Install the Stripe CLI with
npm install -g stripe(or your package manager of choice), then runstripe loginto link it to your account. - Forward webhooks locally with
stripe listen --forward-to localhost:3000/webhook. The Stripe CLI is the standard tool for simulating events and testing webhook handling without touching production. - Grab your API keys from the Developers section of the dashboard. You'll see a publishable key (safe for client-side code) and a secret key (server-side only, never expose it).
- Store secrets in environment variables immediately. Never commit a secret key to a repository, and never render it into client-side JavaScript.
How Do You Implement Checkout Sessions Step by Step?
Building the Stripe payment workflow for Checkout Sessions splits cleanly between server and client responsibilities. Get this division right and everything downstream gets easier.
- Create the Checkout Session server-side. This requires your secret key, so it has to run on your backend. Set the
modetopaymentfor one-time charges orsubscriptionfor recurring billing, and pass eitherprice_datafor a dynamic amount or a savedpriceID for a fixed product. - Return the client_secret from that server response to your frontend. This value tells the client which session to render.
- Initialize Checkout on the client using the Stripe SDK, then mount the Payment Element into a container on your page. The official quickstart walks through the exact initialization calls for React, HTML, and mobile.
- Confirm the payment and set a
return_urlfor the redirect after the customer submits their card details. - Fetch the session status on return to confirm the payment succeeded, failed, or needs another attempt. Never assume success just because the customer landed back on your page.
Pro Tip: Always verify session status server-side before marking an order complete. A redirect back to your success page doesn't guarantee the charge actually cleared.
When Should You Build With Payment Intents and Elements Instead?
A handful of scenarios call for the fully custom route rather than hosted Checkout:
- You're building a checkout experience so specific to your product that a hosted page can't match it
- You need to support unusual or region-specific payment methods beyond what Checkout offers by default
- You're running complex off-session charging, like saving a card during signup and billing it automatically weeks later
For that last case, create the PaymentIntent server-side with setup_future_usage set, attach the payment method to a Customer object, and listen for payment_intent.succeeded and invoice.payment_failed webhook events to track state. Watch for authentication_required errors too. Card issuers sometimes demand extra verification (3D Secure), and your integration needs to handle that redirect gracefully instead of just failing the charge.
The one rule that never bends: PaymentIntents get created server-side, full stop. A secret key in client-side code is a breach waiting to happen.

What Does a Stripe Testing and Go-Live Checklist Look Like?
Testing your Stripe API integration properly before launch saves you from debugging live payment failures with real customer money on the line.
Run the Stripe CLI in listen mode and fire test events at your local webhook endpoint. Stripe CLI supports simulating specific event types, so you can trigger a successful charge, a declined card, a dispute, and a subscription renewal without waiting for real customers to hit each case. Always verify the webhook signature against your webhook secret. Skipping signature verification means anyone who finds your endpoint URL can send fake payment confirmations.
Test these scenarios at minimum:
- Successful one-time payment and successful subscription charge
- Declined card and insufficient funds
- Dispute or chargeback event
- Subscription lifecycle events: renewal, cancellation, and payment failure
Stripe's PCI Service Provider Level 1 certification, the highest tier a payment provider can hold, covers the card data handling itself. Your go-live checklist still needs attention:
- Swap test API keys for live keys in every environment variable
- Point your webhook endpoint at the production URL and re-verify the signing secret
- Enable automatic payment methods so Stripe can offer local options by region
- Monitor logs and payout balances for the first week after launch
How Does Stripe Billing Handle Subscriptions and Invoices?
Stripe Billing covers recurring subscriptions, tiered pricing, usage-based billing, and one-off invoices, all from the same product and price objects you'd use for a single Checkout Session. No additional setup fee applies; you pay standard transaction fees on what actually gets charged.
The bigger win for freelancers and small teams is what Billing automates around the payment itself. Built-in invoices, automated payment reminders, and a customer portal where clients manage their own payment methods cut down the manual accounts-receivable work that eats a Friday afternoon. Stripe's own guidance on invoicing as a freelancer points to automated dunning as one of the more reliable ways to reduce late payments.
Practical setup steps:
- Create a product and price object for your service, whether flat rate, tiered, or metered
- Attach the price to a customer record when they subscribe or get invoiced
- Schedule recurring invoices or trigger one-off ones tied to project milestones
- Enable the customer portal so clients can update cards without emailing you
If you send recurring invoices already, Realclient's guide to automating them covers templates that pair well with this setup.
What Security and Compliance Rules Actually Matter Here?
Two rules cover most of what goes wrong in real integrations. First, secret and restricted API keys never touch client-side code. They live in server environment variables, period. Second, verify every webhook signature against your signing secret before trusting the payload.
Stripe Payments holds PCI Service Provider Level 1 certification, the industry's top compliance tier. That shifts most cardholder-data handling liability off your plate. It doesn't cover everything, though. You still own webhook validation, key storage, retry logic for failed payments, and dunning policy for subscriptions.
- Never expose secret keys client-side, ever
- Validate webhook signatures on every request
- Configure retry and dunning rules for failed subscription charges
- Monitor payment logs for anomalies, not just failures
Pro Tip: Read Realclient's breakdown of security practices alongside Stripe's docs. Compliance isn't one checklist, it's two overlapping ones. For a deeper technical read on PCI DSS specifically, Secure Techie's compliance guide walks through merchant obligations Stripe's certification doesn't erase.
How Realclient Embeds Stripe Checkout Inside Client Portals
Realclient built Stripe Checkout directly into its branded client portals so freelancers and agencies stop bouncing clients between an invoicing tool, an email thread, and a separate payment page. The checkout call happens inside the portal itself, and the resulting invoice surfaces right next to project files and contracts the client already sees.
That consolidation shows up in the numbers. Freelancers and studios using Realclient invoiced more than $48 million through their portals last year, a scale that only works when payment collection doesn't require a client to hunt down a separate link.
On the implementation side, Checkout gets triggered from a project milestone or invoice event inside the portal, and incoming webhook events (checkout.session.completed, invoice.paid) update the portal's project status automatically. No manual reconciliation, no "did they pay yet?" email to write.
Where to Read the Official Stripe Documentation Next
Start with Stripe's main documentation hub for SDK references across Node, Python, Ruby, and mobile. The Checkout quickstart and Payments quickstart cover the exact code you'll write first, and the Billing resources hub is worth a read once you're past one-off payments.
Why Most Stripe Advice Skips the Part That Actually Slows Teams Down
Most Stripe tutorials treat the integration as a solved problem once the checkout page renders. That's the easy 80%. The part that actually eats a sprint is webhook reliability and reconciliation, not the payment form itself. Teams that skip building real signature verification and idempotent event handling early end up firebreak-fixing double charges and missed subscription cancellations months later.
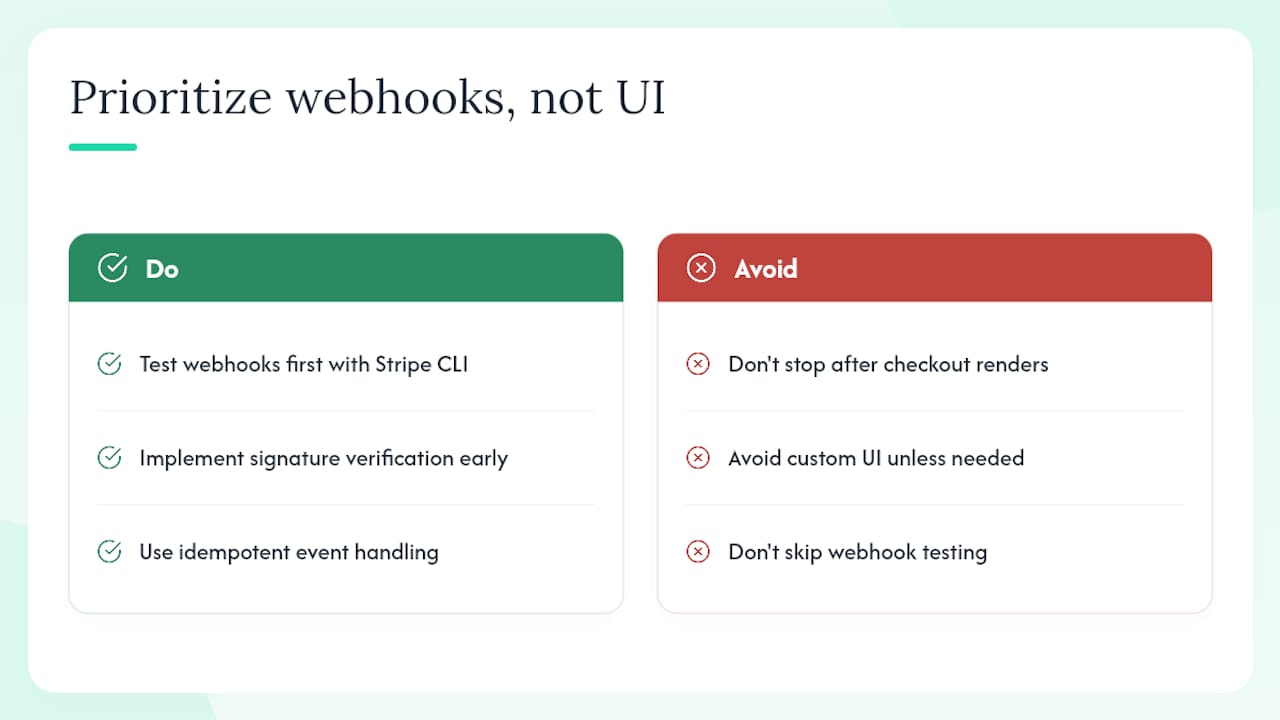
The conventional advice to "just use Elements for full control" also deserves more pushback than it gets. Full control sounds appealing until you're the one maintaining tax logic, currency edge cases, and PCI scope that Checkout Sessions would have absorbed for free. Unless your product genuinely needs a custom payment UI, that control is a cost, not a feature.
If you're prioritizing anything first, prioritize webhook testing with the Stripe CLI before you write a single line of frontend checkout code. Get the event handling solid, then build the UI on top of a foundation that won't silently drop a payment confirmation six weeks after launch.
— Real